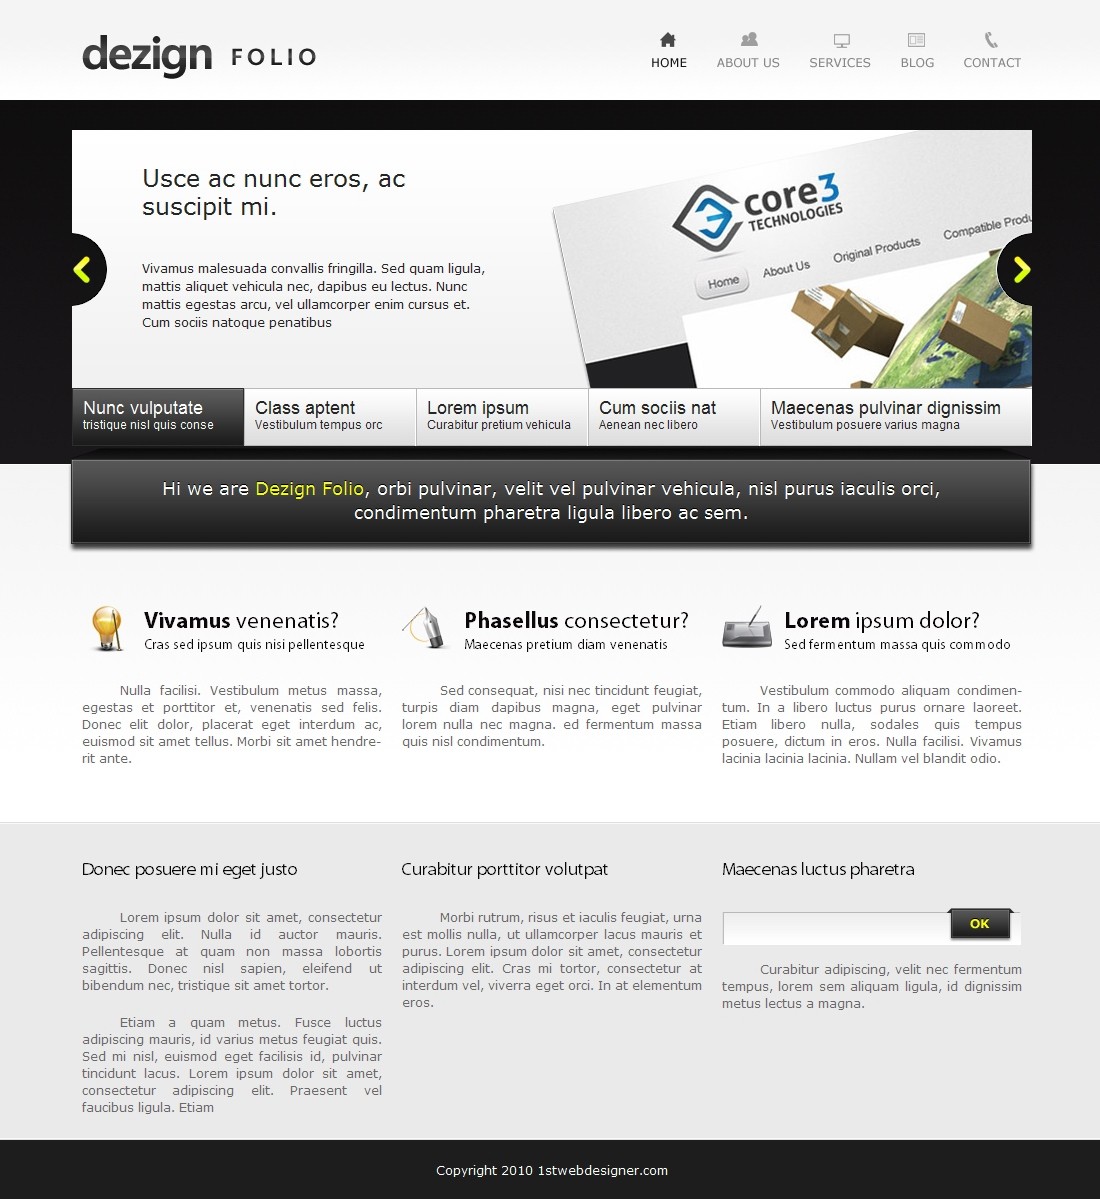
Converting Dezign Folio From PSD to HTML [Very Detailed]

In this article you will learn how to convert Dezign Folio from PSD to HTML in a detailed step-by-step tutorial. You will learn how to create this layout by using a CSS framework, some CSS styles and Javascript. When you’ve completed this tutorial you’ll have a valid HTML/CSS, cross browser compatible and dynamic layout. I hope that you can go through this tutorial and learn a few techniques that will help you in future projects.
Now, let’s get started with this tutorial.
Links you will need to complete this tutorial:
- Dezign Folio: Create A Detailed Portfolio Homepage Design In Photoshop
- 960 Grid System
- jQuery Scrollable
Here’s what we’ll be creating (Click on image to view a full working demo).
You can also download this tutorial’s source files here.
Step 1 – Preparation
If you read the Photoshop tutorial for creating this layout you probably noticed that 960gs grid system was used for guidelines creation. Well, in this tutorial we will also need the 960gs CSS framework. Using CSS frameworks makes layout and style creation a lot easier and saves time in web development. Now you should download the 960 Grid system source files for usage in this tutorial.
You will also need a code editor; you can use a plain text editor such as the Notepad. I always recommend you use a free code editor and get used to it, this helps you get things done faster.
During this tutorial you should test your layout in different browsers, you don’t want to return to the beginning because of browser compatibility issues. In this tutorial I am using some CSS3 styles, but as you might know not all browsers support CSS3 features. The CSS3 styles used in this tutorial have been tested with Firefox version 3.6.
Step 2 – Getting Your Files Ready
First thing you should do is create a directory for your website. I usually create an /images/ directory for images and a /styles/ directory which will hold every style sheet (CSS) file. The HTML file goes in the root directory.
Now you need to grab the CSS files from the 960gs grid system we downloaded earlier, extract the ZIP file and then copy the CSS files from /code/css/ folder to your /styles/ directory, you should copy 960.css, reset.css and text.css files. You should notice a directory called /uncompressed/ which has the same files but in a bigger and more readable format, I recommend using the compressed CSS files. You also need to create a new file in your root directory called index.html and create another file called style.css in /styles/ directory.
In this tutorial we need to export images from Photoshop to use in our HTML layout. You can export these images yourself if you have the layered PSD file from the original Photoshop tutorial, or you can just grab the source files with this tutorial and you’ll find the images I created.
Step 3 – Simple Starter Layout
We need to start by creating a Simple HTML layout as the basis of our site to be. By looking at the Photoshop Layout you should notice a few things:
- The layout has these sections: header, slide show, services, information and a footer.
- You’ll also notice that we can use a single repeating image as the background for the body that covers header, slide show and services.
- Both information and footer sections have the same horizontally repeating background image.
- Finally, notice that header, slide show, information and footer sections have fixed heights.
Based on these points we create the following HTML layout.
DOCTYPE html PUBLIC "-//W3C//DTD XHTML 1.0 Transitional//EN" "http://www.w3.org/TR/xhtml1/DTD/xhtml1-transitional.dtd">
xmlns="http://www.w3.org/1999/xhtml">
css" href="styles/reset.css" rel="stylesheet" media="all" />
css" href="styles/text.css" rel="stylesheet" media="all" />
slide show content goes here.
- Login om te reageren


