The Ultimate Guide to Getting Started with Zen Cart (Part 3)

 So after asking everyone and seeing the responses, I decided to go one more step further with the Zen Cart Guide I have created. Keep in mind that this by no means covers everything – but it does touch the surface of most of the more important items to get you up and going with Zen Cart. There are plenty of other hacks and work-arounds that can be found online, so I really wanted to use part 3 of this to focus on some of the other major things that can be done within Zen Cart.
There were still so many things I felt got left out from Part 1 and Part 2 of this tutorial, that I really wanted to get into some more stuff that really helped me when beginning Zen Cart. Here is a quick overview of what will be covered in this Part 3 tutorial:
1. New Buy Now and Checkout Buttons
2. Pretty URLs and SEO
3. Zen Cart Security
4. Using Adsense in Zen Cart
5. Using Paypal in ZenCart
6. Admin Appearance – Logos and CSS
New Button Graphics
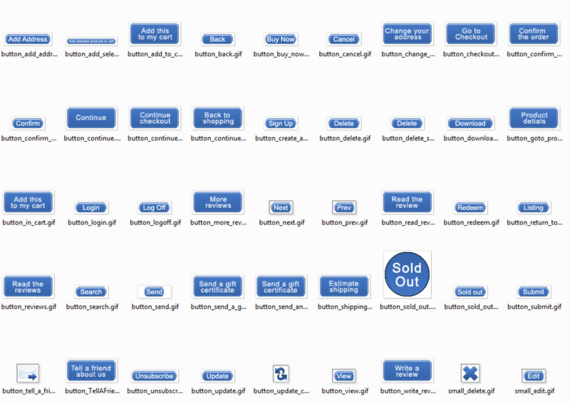
After my first client install of Zen Cart I was not happy with how the buy now and checkout buttons looked. After doing some digging I found that within the admin panel you can set the buttons to be CSS only buttons, or to use images. Not being happy with either one I decided to change the buttons all together. There are a number of readily downloadable buttons online that I have found online, but the best central source is probably direct from Zen Cart.
Directly from Zen Cart (User Submitted):
The button images that we will be changing are located in the:
“includes” – “templates” – “template_default” – “buttons” folder of the template directory and can be edited or re-created to fit your individual needs.
Other pre-made button sets for Zen Cart can be found online, but I have had the best luck creating them myself. This way is the most useful so you can make your template very custom to fit your needs.
Pretty URL’s in Zen Cart for SEO
This was one of the first things I started looking into after getting my first Zen Cart install set up most all the way. I noticed that the pages were not SEO friendly. To achieve this there is both a manual way and also some modules that will do this for us. I will show you the modules, which also come with some other advanced features for SEO purposes.
For those of you who don’t know or understand “pretty url’s” I will briefly explain. By default, the Zen Cart PHP will redirect URLS for pages and products to be something similar to the following:
http://domainname.com/index.php?main_page=index&cPath=21
This is not always the best thing for SEO since search engines like Google like to see more “named” locations of a website. Most all XML sitemaps will be read better as well by using straight forward category names for items on your website.
What we are looking to create is something more like this example:
http://domainname.com/category_name
To achieve this, we could edit some of the PHP code, and modify the .htaccess file – but an easier way is to use some modules that are provided online. Some of the ready-made Zen Cart modules are excellent at making some of the smaller tasks easier for us.
Here are 3 module options for pretty URLs and SEO provided from the Zen Cart module directory:
Zen Cart Security
This was something else I decided to look into after setting up a website using Zen Cart and realizing the amount of sensative data I was storing online. I knew that Zen Cart itself was pretty stable and seemed rather safe, but I still wanted to do my research to find out what more could be done to further protect my Zen Cart install and my online store.
Here are a few things that are good practice for keeping your Zen Cart powered website secure: Remember that there are other addon modules as well that can help protect your Zen Cart install. Here is a basic list of things to remember that will protect you from the start.
- 1. Delete the Zen Cart install folder after your installation is complete
- 2. Rename your admin folder to make it harder for others to find
- 3. Set configure.php files as read-only using CHMOD
- 4. Delete unused Admin accounts so there are no open gateways to your admin panel
- 5. Maximize Admin Password Security – The longer the password the better
- 6. Use .htaccess files or index.htm files to protect against wrongful browsing of your site
- 7. Make recent backups of your website files and database.
- 8. Check your server’s error log and your Zen Cart admin log regularly for strange activity.
- 9. Look for any links that went to a page that isn’t in your site.
- 10. Check your website files regularly to be sure nothing’s been added or altered.
- 11. Use only one browser tab to access your Admin area when working in your Admin panel
- 12. Always log out of your Admin panel when not using it
Google Adsense in Zen Cart
For those of you who are looking to monetize on Google Adsense as well as products you sell, then you will be happy to know there are also some really easy to use modules available that will integrate your Google Adsense code to be injected on the site to use. There are two that I have used previously and would suggest if you are starting out with Zen Cart. As always, you can manually modify the template file to insert your Adsense code as well, but I would suggest starting out with using modules.
PayPal in ZenCart

This was another topic I found myself researching when getting my own Zen Cart install going. I started realizing it was not as easy at first as I initially thought to integrate PayPal payments into Zen Cart. I later found that there is a built in module for setting up and using PayPal inside of Zen Cart. This works best when setting up “Zones” for shipping, or when using the custom shipping module. Since PayPal is one of the most common online payment methods, I figured this would be of great help to add this resource I found online. It is the Zen Cart PayPal Wiki.
Customize Your Admin Panel
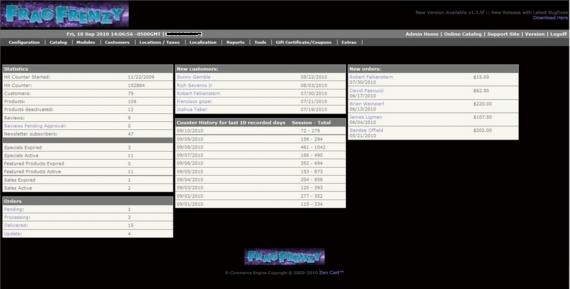
This was my latest project. My first Zen Cart client contacted me and requested a custom admin panel. I was excited and knew that since this was a first I wanted to document it to discuss here for part 3 of this tutorial. I found it really easy to use a few .css files to customize the entire look of the admin panel to match the rest of the site.
I found there are 4 main .CSS files to edit to fully customize the Admin Panel. Each of these files are located in the “Admin” – “Includes” directory. Here are the four files we will be looking at:
Admin Panel .CSS Files
cssjsmenuhover.css
index.css
menu.css
stylesheet.css
Each of these 4 different .css files change items within the admin panel. Using these files I created a fully custom Admin Panel for the client. The cssjsmenuhover.css file was used to customize the dropdown menu, and the index.css was the main layout and colors of the admin panel. The menu.css file was used for the sub-menu and menu area, and the stylesheet.css was the other small items such as item boxes that are used in the admin panel. Playing around with these files gave me the results I was looking for, and it was a lot easier than I even thought. I know now that I will be editing these more in the future to create more custom Zen Cart Admin panels.
Other Zen Cart Resources and Links

Here is a small list of some other very useful Zen Cart websites. Each of these are ones that I have used to find templates, and other source code and hacks from. These links will help you take your Zen Cart Even Further.
- 1. GetZenned
- 2. Zen Cart Addons and Modules
- 3. Zen Cart Tutorials
- 4. Zen Cart Showcase
- 5. Zen Cart Tips
- 6. Zen Cart Support Forums
- 7. Zen Cart Templates
- 8. Zen Flavor
- 9. HiddenPixels Zen Cart Templates
- 10. Zen Cart CSS Resource
In Closing…
I hope everyone has enjoyed my 3 part Getting Started with Zen Cart Guide. I look forward to the comments and questions. I will help as much as possible to everyone that does have questions. I feel like I have covered most of the main things that should be looked at when installing and working with Zen Cart. If there is enough of a response on certain things I may even go to a part 4. Thank you everyone for reading, and I hope you all enjoyed it.
- Login om te reageren


